


Our Latest Building Projects
The examples below offer a quick, pictorial, example of the stages in some of our recent projects. These are updated often so please visit again soon. Pictures are also updated onto our Facebook page live from the site, so make sure you hit the 'Like' button to keep up to date.
Media Wall
The project involved an existing flat wall being adapted to take a false chimney breast with integrated media system and heating.
Timber frame stud work was erected to form a false chimney breast approximately 2.4m in width. The timber construction allowed for integrated shelving on the side elevation to eventually house the landline telephone, router and booster system for the internet within the property.
Once timber work was erected the whole framing system was clad in 12.5mm plasterboard and a false back was fitted in the TV housing area, this enabled the hiding of all cables whilst at the same time allowed the installation of strengthening timbers to take the weight of the eventual TV. Two additional apertures were fitted below the TV housing which would allow for installation of the TV media box and a DVD player, the shelf would hold the sound bar.
The lower aperture was formed to house an electric fire, this particular version fitted with colour changing effect for mood altering, while still being capable of a serious level of heat output if required via the integrated fan system, all remotely controlled.
Once the plaster was dry and the area decorated the TV bracket was fitted and the TV connected ready for use.
A black quartz hearth and upstanding finished the project.


Bespoke Garden Room
This bespoke garden room was constructed to the customers requirements on site and positioned in their large garden to take advantage of the late afternoon sun.
A 200mm hardcore and concrete base was laid to form a slab for the timber frame building.
Time stud flooring walls and roof were erected and all insulated to make the building suitable for year round use.
The roof was tiled with clay pan-tiles to comply with planning requirements and the exterior finished in black barn cladding.
Bi-fold black aluminium doors with fixed glazed returns were fabricated and installed two form a bay effect to the front elevation.
Internally the building was plasterboard, skimmed and emulsion painted.
The external seating deck was finished with composite decking, and rainwater pipes deliver the water to a pond dug adjacent to the building.


Gym Build
This double garage was converted to a home Gym with retained storage behind one of the garage doors, and additional storage on a raised boarded area in the loft.
The floor of the garage had a damp-proof membrane laid and was then overlaid with 100mm of polyurethane solid insulation board before have 22mm thick tongue & groove flooring sheets laid.
All walls around the new gym area were constructed in 100x50 treated timbers erected at 400mm centres and infilled with acoustic fibreglass insulation before having foil backed plasterboard screwed to the face. The wall in the storage area was finished in 12mm plywood for additional security and strength.
Ceilings also had plasterboard fitted and 300mm of fibreglass loft insulation was laid above them.
A 3.3m opening was cut into the side elevation of the garage and suitable sized 3.6m lintel installed. The opening was then fitted with a set of Anthracite Grey uPVC French-doors with side windows.
Once plastered and electrics had been installed the garage floor was finished with 20mm gym grade rubber matting.


Garden Lanscaping
This project involved the hard and soft landscaping in a new build property. The garden had a substantial slope from the rear where other properties were build, down towards the main property.
The adjacent double garage (seen in picture 1) had been previously converted into an annexe and a section of the original garden portioned off to allow access to the annexe and to provide a garden at the rear. A feather-edge boarded fence had been erected to separate the areas.
The turf in the original garden was stripped and oak sleepers bedded onto a concrete base were positioned, forming raised beds at the rear of the garden. This housed several trees and a box hedge, which would eventually form a screen to provide privacy.
More oak sleepers were positioned to form layered areas of garden taking out the original slope within the garden. These layered areas allow different zones to be formed. LED lighting was also placed into the timber sleepers.
After turfing had been laid the area closest to the main property had porcelain slabs laid, as did a small area at the rear of the garden.
Potted trees and shrubs were set into further raised beds to soften the feel of the new garden, and again provide screening and privacy.
A timber pergola was constructed at the rear of the garden and within the pergola a raised sleeper wall was constructed. This raised walling was insulated and lined to form a small raised pond area with waterfall feature.
The upper lawned area was converted to a decked area using composite decking on a treated timber framework, with raised beds and steps leading to the decked area.
Further shrubs and planting provided colour and a feature in any area of the garden still affected by water run-off from surrounding gardens. The use of water tolerant shrubs and grasses assisted with preventing future water-logging issues.
Water planting and Koi Carp were added as the water within the pond settled and allowed their integration.
The final picture shows the finished product when lit at night, and a further raised area to the side of the garden designed for use as a barbecue area.


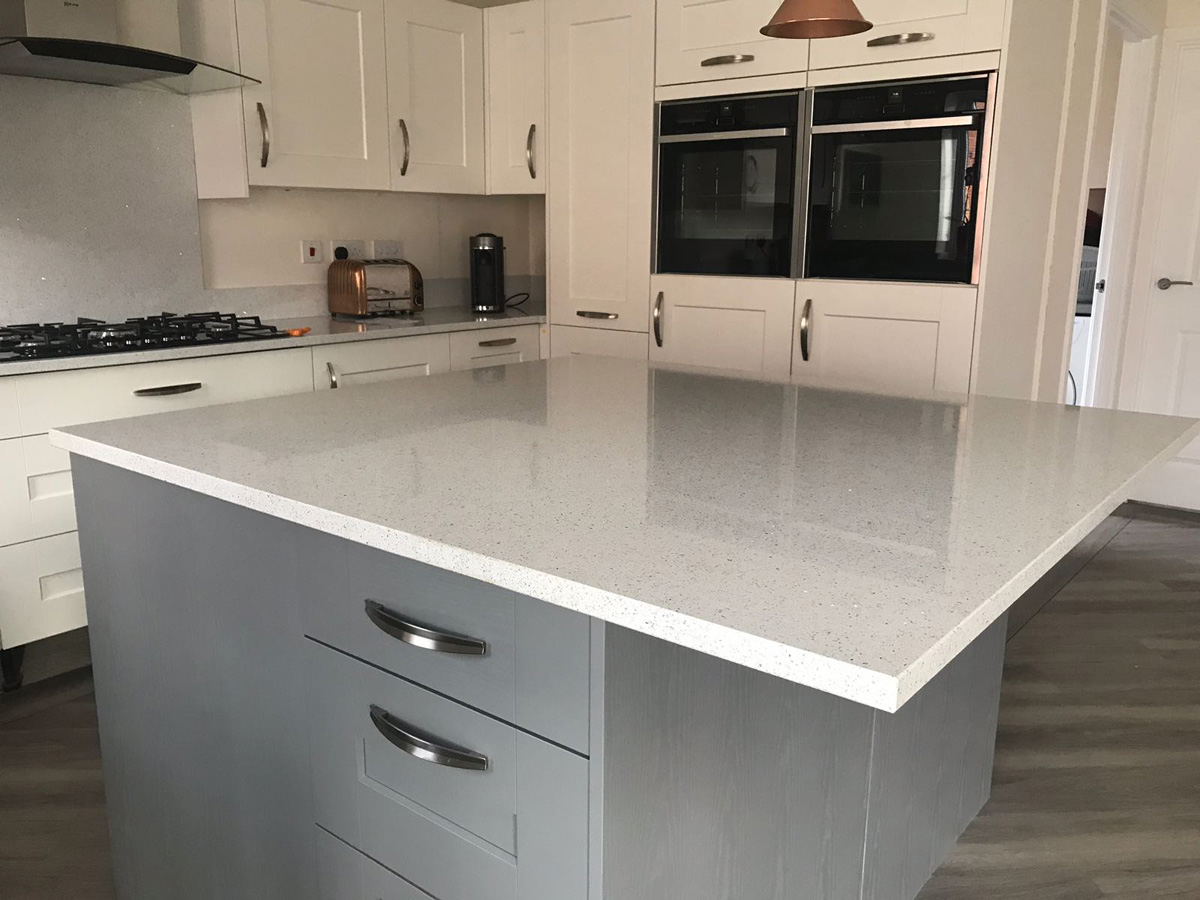
Kitchen Refurbishment
The original kitchen comprised of a sink area with integrated dishwasher, hob area and tower unit area containing 1x double oven and 1x integrated fridge-freezer. Worktops were standard laminate providing about 3.8 linear metres of usable work surface
With units changed (retaining cabinetry where possible) the sink side stayed basically unchanged as did the hob side. With the corner storage tower unit removed the worktop area increased and the range of units on the tower side were switched to incorporate 2 x single ovens with 2 x fridges below.
The new island area incorporated 2 x single freezer units and pull-out spice rack facing the hob, a drawer unit facing the sink side and a further drawer unit facing the ovens, with a 400mm overhang to provide a bar seating area.
Worktops were switched to quartz with 4.4 linear metres of useable work top and an additional 1.6m x 1.6m work area on the island. An undercounted composite double sink replaced the original stainless steel sink.
Units were paintable to enable future colour change, and flooring was Amtico Nordic Oak, laid on the diagonal with a dark insert around the borders.
Lighting over the island and under cabinet plus plinth LED lighting strips completed the refurbishment.
Original Kitchen


Refurbished Kitchen


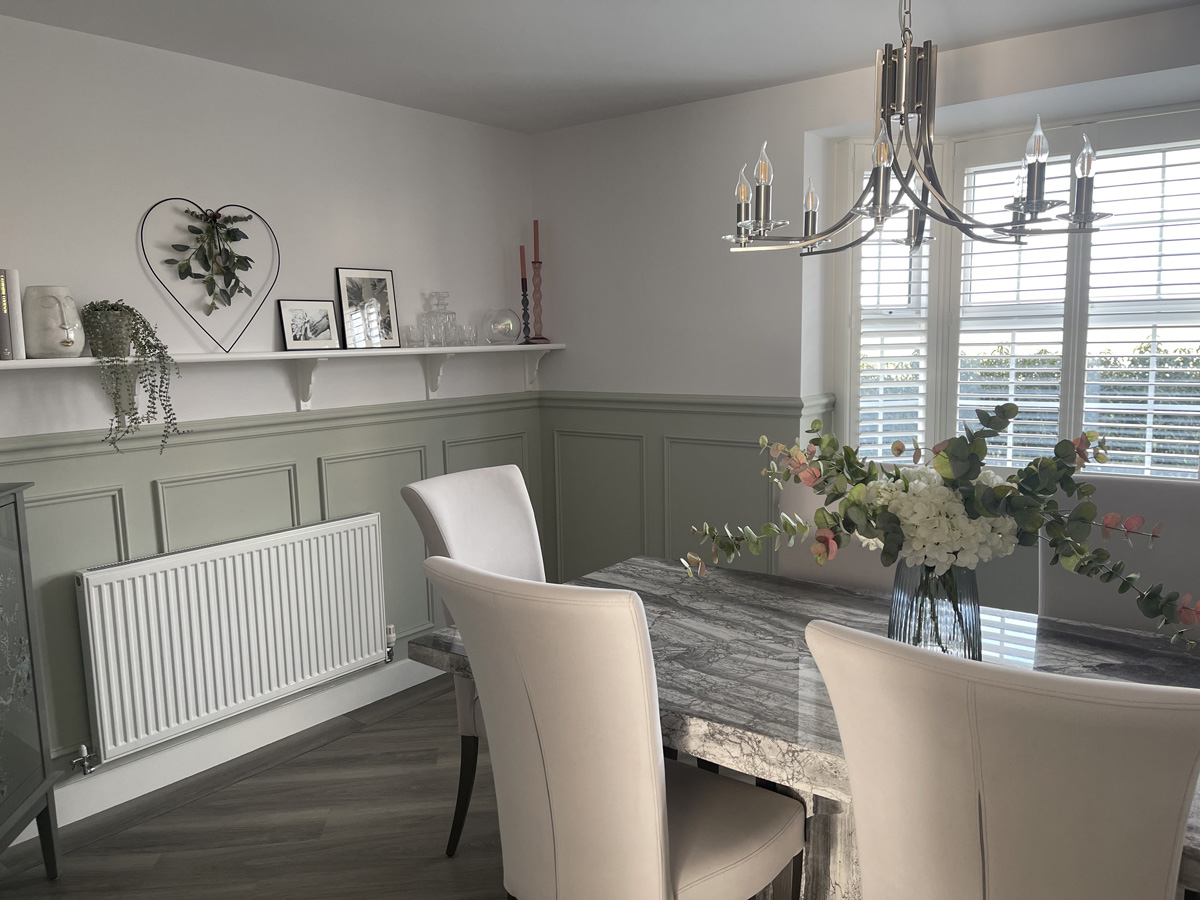
Dining Room False Panelling
In this project timber beading was glued and pinned to the existing walls to create panelling. Once all panels had been created and a shelving display area constructed, the walls were painted in Farrow & Ball WEVET on the upper wall and ceiling, with Farrow & Ball CROMARTY on the lower wall areas.
Amtico Nordic Oak was used on the floor, laid on the diagonal with a dark insert around the border.


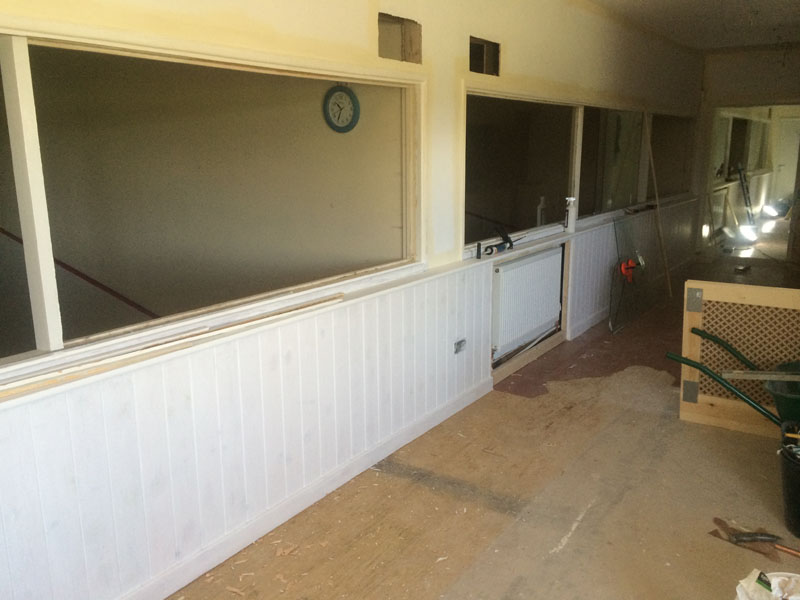
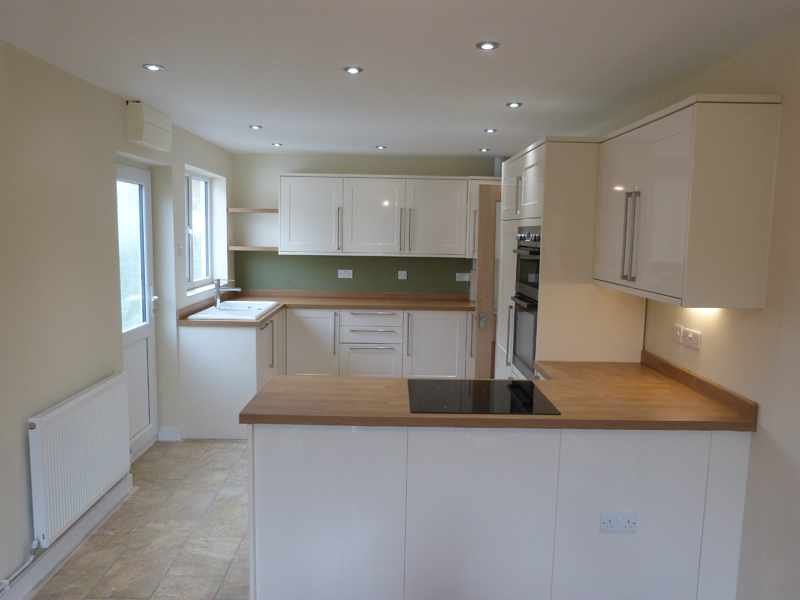
Small Kitchen Refit
This was a refit of a small kitchen, requiring removal of the existing kitchen and a floor to ceiling warm air heating system. The owners wanted a more modern kitchen incorporating modern appliances.


Garden Design and Landscaping in Biggleswade
We undertook this garden re-design and landscaping in early 2016 in Biggleswade.
Below is a general description of each image.
Images 1 and 2 - Finished garden from above.
Image 3 - Artificial grass with beds to the side. (Artificial grass with consolidated hardcore and sand bed, approx 80m area).
Image 4 - Solid Indian-sandstone ball water feature with pump.
Image 5 - Oak sleeper raised beds infilled with soil and finished with a plum slate covering. (Oak sleepers x 30, topsoil, weed membrane, slate covering).
Image 6 - Scandinavian softwood decking adjacent to the artificial grass. (Approximately 15m area).
Image 7 - Raised beds filled with an arrangement of shrubs.
Image 8 - Treated arch slatted-fencing panels on treated softwood timber posts.
Image 9 - Indian-sandstone paving forming the patio area.
Image 10 - Glass roofed conservatory with bifold doors. (uPVC conservatory fitted with bi-fold doors and heat reflective glass roof, brickwork, concrete base and tile finished floor with underfloor heating system.


Refurbishment of Biggleswade Rugby Club Lounge Bar
This most recent project revolved around the refurbishment of the lounge bar which overlooks the Squash courts at Biggleswade Rugby Club.
The building was erected around the mid 1970's and was in dire need of modernisation and refurbishment.
We were contracted to undertake all of the building, electrical and decorating work on this project.
The original ceiling in the bar and lounge area was a suspended grid system ceiling with acoustic tile finish. These were removed to reveal a mass of wiring and deflected roof supports! New tiumber joists were positioned to form a new level ceiling, and a complete new lighting system of LED downlighters was wired into the new ceiling void. These lights were incorporated into a new plasterboard ceiling which was then plaster skimmed.
The walls were stripped of all the old wallpaper and then re-skimmed.
New uPVC windows were installed to replace the old timber frames, and the glass overlooking the Squash courts was removed and replaced with laminated safety glass.
The old radiator system was stripped and new, larger more efficient radiators installed.
The lower section of all walls was then carcased out and timber clad to form a panelled finish, with the radiators behind screens in the panelling. The top of the panelling was shelved to offer an area to rest your pint glass.
A false chimney breast was built to eventually house an electric woodburner and large flatscreen TV.
The bar was panelled to match the walls and new storage shelves constructed for behind the bar area which will eventually be used to stock a range of 'nibbles'and 'spirits'. Miniature LED downlights were installed around the bar front to offer a warm cozy feel.
All the surfaces were then decorated. The ceilings emulsioned in White, the top of the walls emulsioned in a pale Cream, and the panelling given a satin-gloss finish in Caramel.
Finally new carpets were laid in the lounge area, vinyl 'Karndean' flooring around the bar with new seating, sofas and tables. These were all provided by another supplier.


Bungalow Renovation in Shefford
This latest project involved taking a Bungalow which had stood empty for several years and completely updating it.
Several internal walls were removed and repositioned in order to improve the flow of the property.
The original toilet was altered and an entrance cut through from the adjacent bedroom, it was then fitted out as an en-suite for that room. Space from another bedroom was then adapted and integrated wardrobes were able to be produced for the new master bedroom.
The old kitchen and dining rooms were knocked through into one area and a modern kitchen-dining space produced with integrated dishwasher, fridge and tower oven, one of the new wall cupboards was adapted as a housing cupboard for the new heating system's boiler unit, and the rear window replaced to provide French-door access to the rear garden.
The lounge French-doors were replaced with a new window, and the chimney opened up to take a woodburner stove.
The original bathroom was enlarged and access formed direct from the hallway with the new bathroom being fully fitted with cabinetry, sanitaryware, tiled walls and floors.
The dining room floor and hallway floor where finished off with solid Oak timber floor, and all the internal doors throughout the property where replaced with Oak panel doors.
New uPVC windows and a composite front entrance door were installed.


House Extension in Biggleswade
This project involved constructing a ground floor extension to the rear of the property, and a double storey extension to the side incorporating a garage.
Although the internal alterations are not shown in this collection, the images offered hopefully give an insight into the way we try to keep a property clean and tidy throughout the building process.
After all, to us it may be a building site, to you it’s your home.


Loft Conversion in Biggleswade
This project involved converting an existing double storey property to make it into a three storey property. Not so straightforward as some as the original roof was not high enough and had to be completely removed. This may seem a major process to go through, but when you think it eventually provided a 50% increase to the accommodation areas of the house, it was well work the effort. A large master bedroom with ample built-in storage was added, as well as a very large en-suite facility.


In 99% of cases I take a nominal deposit at the point of the customer accepting my quotation, this secures an approximate start date. On smaller jobs I will generally not issue an invoice until the work is completed. On contracts of 4 weeks or greater invoices are issued monthly.
All of our work carries a personal guarantee, and as we work mainly within our local community it would not be good practice to do anything other than provide a service people are happy with. We are a long established family business, and wherever possible we source our materials locally or use sub-contract trades, (the majority of whom we have worked with for many years), from within the local community.